
When it comes to home safety, knowing how to repair garage door sensor issues is essential. Garage door sensors play a crucial role in ensuring that your garage door opens and closes safely and efficiently. These sensors help prevent accidents by detecting obstacles in the door’s path, stopping the door from closing if something or someone is in the way.
Garage door sensors are small but mighty components of your garage door system. They are typically installed a few inches off the ground on either side of the door, constantly monitoring for any interruptions in their infrared beam. If this beam is broken, the sensor signals the garage door opener to halt the door’s motion and reverse it if it’s closing. This technology has significantly reduced the number of injuries and accidents related to garage doors.
Over time, however, these sensors can become misaligned, dirty, or damaged, causing them to malfunction. When this happens, your garage door may refuse to close, or it might stop and reverse unexpectedly. This not only poses a security risk but can also be a major inconvenience. Properly functioning sensors are crucial not just for the safety of your family and pets but also for the security of your belongings stored in the garage.
In this guide, we’ll walk you through the process of diagnosing common sensor issues and provide a step-by-step guide on how to repair garage door sensors. From understanding the basic mechanics to executing a successful repair, you’ll find everything you need to know to keep your garage door operating smoothly and safely. Read on to learn how you can diagnose and repair your garage door sensor to ensure your home remains safe and secure.
Understanding Garage Door Sensors
Explanation of How Garage Door Sensors Work
Garage door sensors are an essential safety feature in modern garage door systems. They operate by creating an invisible line of communication across the door’s threshold, typically a few inches off the ground. Most garage door sensors are photo-eye sensors, which use an infrared beam to detect obstacles.
Here’s a closer look at how they function: One sensor emits an infrared beam while the other sensor receives it. This beam travels uninterrupted as long as there are no obstructions. When the garage door is closing, if something crosses this beam and interrupts it, the sensors immediately signal the garage door opener to stop and reverse the door’s motion. This prevents the door from closing on a person, pet, or object, ensuring safety.
Common Types of Sensors
There are two primary types of sensors used in garage door systems:
- Photo-Eye Sensors: These are the most common type. They consist of two units installed on either side of the garage door. One unit emits the infrared beam, and the other receives it. If the beam is interrupted, the door will stop closing and reverse direction.
- Safety Sensors: Sometimes referred to as edge sensors, these are usually installed on the door’s bottom edge. They detect physical contact with an object and trigger the door to stop and reverse. While less common in residential setups, they provide an added layer of safety, particularly in commercial settings.
Importance of Proper Alignment and Functionality
The proper alignment and functionality of your garage door sensors are crucial for several reasons:
- Safety: The primary purpose of these sensors is to prevent accidents. Misaligned or malfunctioning sensors can fail to detect obstacles, potentially leading to injury or damage.
- Security: A malfunctioning sensor can prevent your garage door from closing, leaving your home and belongings vulnerable to theft or weather damage.
- Convenience: Faulty sensors can cause your garage door to stop and reverse unnecessarily, creating frustration and inconvenience.
To ensure your garage door sensors are functioning correctly, they must be properly aligned. Misalignment is one of the most common issues affecting garage door sensors. This can occur due to vibrations, accidental bumps, or gradual shifts over time. When the sensors are misaligned, the infrared beam cannot travel straight across, leading to false detections of obstacles.
Regular maintenance, including cleaning the sensor lenses and checking their alignment, can help prevent issues. Using a level to ensure the sensors are at the same height and facing each other directly can often resolve many sensor problems.
Understanding how these sensors work and the importance of keeping them properly aligned and functional can help you maintain a safe and secure garage door system. For a step-by-step guide on how to diagnose and repair any sensor issues, read on.
Diagnosing the Problem
Signs of a Malfunctioning Sensor
Identifying a malfunctioning garage door sensor is the first step in repairing it. Here are some common signs that your garage door sensor might not be working properly:
- Garage Door Won’t Close: If your garage door starts to close but then immediately reverses, this is a strong indicator that there is an issue with the sensors.
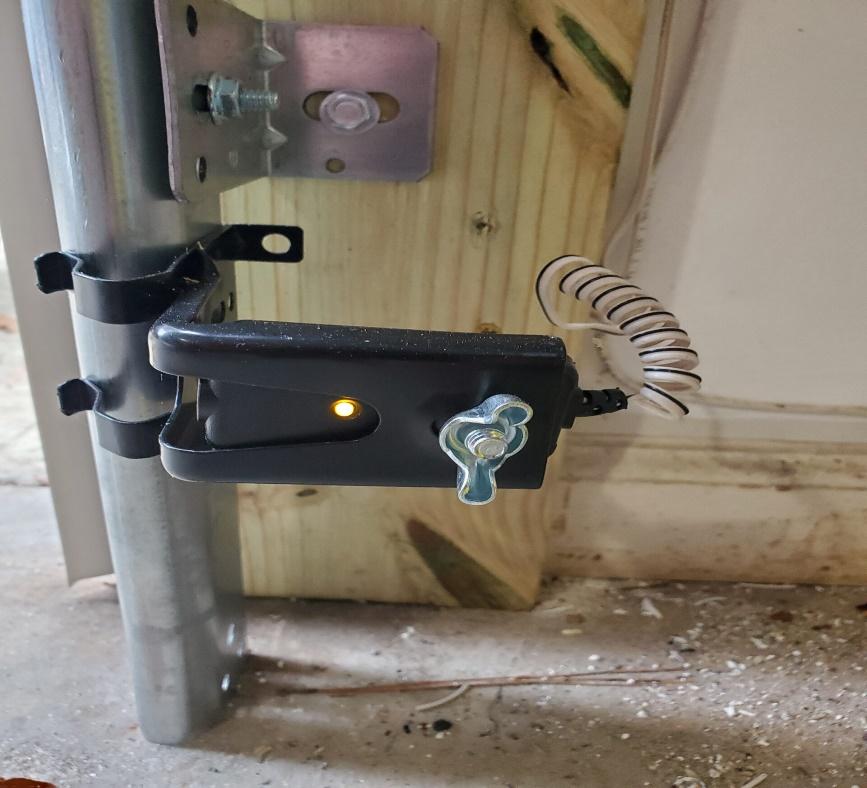
- Blinking Lights: Many garage door openers have indicator lights on the sensors. If these lights are blinking, it usually means there is a problem such as misalignment or obstruction.
- Continuous Beeping: Some garage door openers emit a beeping sound when there is an issue with the sensors.
- Erratic Door Behavior: The door might stop and reverse randomly or operate very slowly.
- Indicator Lights on the Garage Door Opener: If the main unit shows a flashing light or an error code, this could also point to a sensor problem.
Initial Troubleshooting Steps
Before you dive into more detailed repairs, there are a few basic troubleshooting steps you can take to diagnose and potentially resolve the issue with your garage door sensors.
1. Checking for Obstructions
The most common cause of sensor issues is an obstruction blocking the infrared beam. Check the area around the sensors to ensure there are no objects, dirt, or debris blocking the beam.
- Remove any Objects: Clear away any toys, tools, or other items that might be in the path of the sensors.
- Inspect for Small Debris: Even small amounts of dirt or spider webs can obstruct the sensors. Wipe away any such obstructions with a soft cloth.
2. Cleaning the Sensors
Dirty sensor lenses can prevent the infrared beam from transmitting properly. Regular cleaning can help maintain sensor functionality.
- Turn Off the Power: For safety, disconnect the power to the garage door opener before cleaning the sensors.
- Use a Soft Cloth: Gently wipe the sensor lenses with a soft, dry cloth. Avoid using any harsh chemicals or abrasive materials, as these can damage the lenses.
3. Ensuring Proper Alignment
Misaligned sensors are another common cause of garage door sensor issues. The sensors need to be perfectly aligned for the beam to transmit correctly.
- Check the Alignment: The sensors should be facing each other directly. If they are out of alignment, the infrared beam will not be received properly.
- Adjust the Sensors: sensors can be adjusted if they are not aligned by releasing the screws that hold them in place, moving them until they are, and then tightening the screws once more. To make sure they are the same height, use a level.
4. Testing the Sensors
After performing these initial troubleshooting steps, test the garage door sensors to see if the problem has been resolved.
- Reconnect the Power: Turn the power back on to the garage door opener.
- Close the Garage Door: Use the remote or wall switch to close the garage door. If it closes smoothly without reversing, the sensors are likely functioning correctly. If the problem persists, further inspection or replacement might be necessary.
By following these initial troubleshooting steps, you can often identify and resolve common issues with your garage door sensors. For more detailed guidance on repairing or replacing faulty sensors, continue reading our comprehensive repair guide.
Step-by-Step Guide: How to Repair Garage Door Sensor
Repairing your garage door sensor might seem daunting, but with the right tools and a systematic approach, you can get your new garage door functioning properly again. Here’s a step-by-step guide to help you through the process.
Tools and Materials Needed
- Screwdriver
- Level
- Soft cloth
- Replacement sensors (if necessary)
- Electrical tape
- Multimeter (for checking wiring)
Step 1: Turn Off the Power
Safety first. Before working on your garage door sensors, ensure that you disconnect the power to the garage door opener to prevent any accidental operations.
- Locate the power cord connected to the garage door opener and unplug it from the electrical outlet.
- If your garage door opener is hardwired, turn off the circuit breaker that controls the garage door opener.
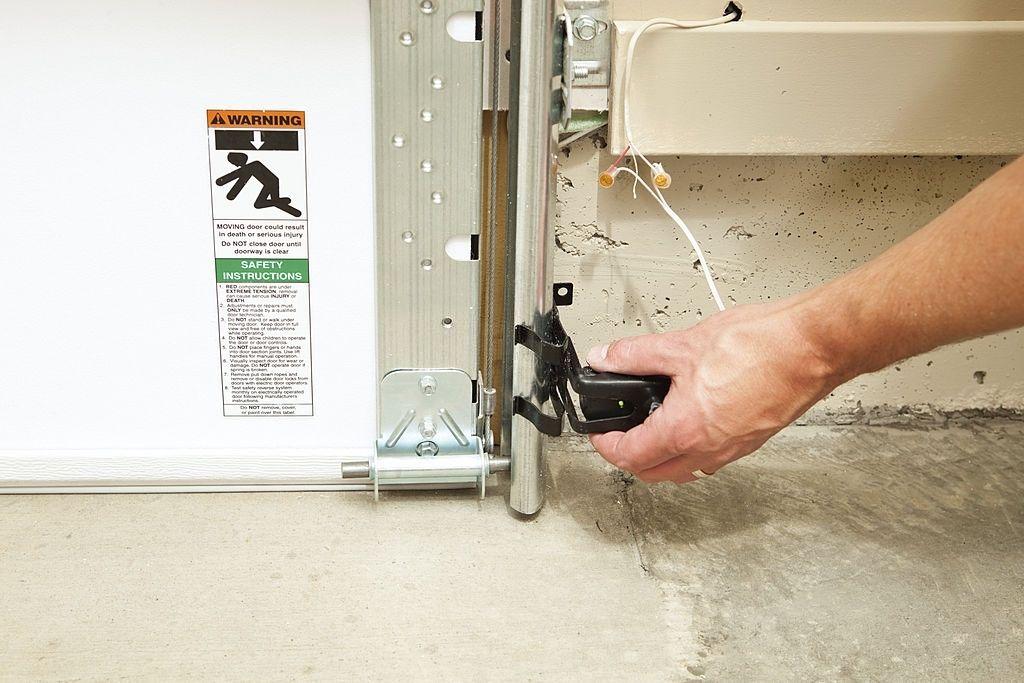
Step 2: Inspect the Sensors
Carefully examine both sensors for any visible damage or issues.
- Look for cracks or breaks in the sensor housing.
- Check the wiring connected to the sensors for any signs of wear or damage.
- Ensure that the sensors are firmly mounted and not loose.
Step 3: Clean the Lenses
Dirty sensor lenses are a common cause of malfunction. Clean the lenses thoroughly to ensure they are free from any obstructions.
- Use a soft cloth to gently wipe the lenses of each sensor.
- Steer clear of utilizing abrasive or strong chemicals as they may scratch or harm the lenses.
Step 4: Adjust the Alignment
Sensor misalignment may make it impossible for the garage door to operate properly. Make sure the sensors are positioned correctly.
- Use a level to check that the sensors are at the same height on either side of the garage door.
- If the sensors are not aligned, loosen the mounting screws, adjust the sensors until they face each other directly, and then retighten the screws.
- Many sensors have indicator lights that turn solid when the alignment is correct. Adjust until both lights are solid.
Step 5: Check the Wiring
Sensor problems might also be caused by bad wiring. Look for any damage or loose connections in the wiring.
- Look for any frayed wires or disconnected connections.
- Check the wire for continuity with a multimeter. Replace or fix any broken wires if you discover any problems.
- Ensure that all connections are secure and properly insulated with electrical tape if necessary.
Step 6: Test the Sensors
Once you’ve cleaned, aligned, and checked the wiring of the sensors, it’s time to test them.
- Reconnect the garage door opener’s power supply.
- Use the remote or wall switch to close the garage door.
- Pay attention to how the garage door operates. The sensors are working properly if they close smoothly and don’t reverse. You might have to get new sensors if the issue continues.
By following these steps, you can often resolve issues with your garage door sensors and restore proper functionality. However, if the sensors still don’t work after these steps, it might be time to consider professional help or sensor replacement.
Preventive Maintenance Tips
Maintaining the proper functioning and prevention of future problems with your garage door sensors can be achieved through routine maintenance. To maintain the optimal condition of your sensors, follow these tips:
Regular Cleaning and Inspection
- Clean the Sensors Monthly: Use a soft cloth to wipe down the sensor lenses regularly to prevent dust and debris buildup.
- Inspect for Damage: Periodically check the sensors and wiring for any signs of wear or damage.
Keeping the Sensors Aligned
- Check Alignment Regularly: Use a level to ensure the sensors remain properly aligned.
- Reposition if Necessary: If you notice any misalignment, adjust the sensors as needed to maintain a clear path for the infrared beam.
Ensuring the Area Around the Sensors is Clear
- Remove Obstructions: Keep the area around the sensors free of any objects that could block the infrared beam.
- Trim Vegetation: If your garage is near plants or shrubs, make sure to trim any overgrowth that could interfere with the sensors.
By incorporating these preventive maintenance tips into your routine, you can extend the life of your garage door sensors and ensure they continue to operate safely and effectively. For more detailed guidance on maintaining your entire garage door system, keep reading our comprehensive guides.
When to Call a Professional
While basic troubleshooting can resolve many garage door sensor issues, some problems require professional expertise. Knowing when to call in an expert is crucial for maintaining safety and functionality. Here’s when you should seek professional help:
Identifying Problems That Require Professional Assistance
- Persistent Malfunctioning: If your sensors don’t work despite cleaning, aligning, and inspecting the wiring, it may indicate a deeper issue that requires a professional’s specialized tools and knowledge.
- Complex Electrical Issues: Significant wiring problems or electrical issues with your garage door opener should be handled by a licensed electrician or garage door technician to ensure safety and compliance.
- Sensor Replacement: If your sensors are damaged or need replacement, a professional can ensure proper installation and compatibility with your existing system.
- Garage Door Opener Issues: Problems with the garage door opener, like unusual noises or erratic behavior, may be linked to sensor issues. A professional can provide a comprehensive inspection and repair.
- Safety Concerns: If you’re unsure about handling repairs or feel uncomfortable with the process, it’s best to hire a professional to avoid injury or further damage.
Benefits of Hiring a Professional Repair Service
- Expertise and Experience: Professionals have the training to accurately diagnose and repair sensor issues, saving you time and frustration.
- Proper Tools and Equipment: They come equipped with the right tools to ensure repairs are done efficiently and correctly.
- Safety: Professionals handle repairs safely, reducing the risk of injury and damage to your property.
- Warranty and Guarantees: Many services offer warranties on their work, providing peace of mind if issues recur.
- Comprehensive Service: Professionals inspect the entire system, identifying potential problems and extending the lifespan of your garage door.
If you’re dealing with persistent problems or feel unsure about repairs, don’t hesitate to contact a professional repair service. For more tips and assistance, stay tuned to our blog or reach out to us directly. Keep your garage door running smoothly and safely by addressing sensor issues promptly!
FAQs: How to Repair Garage Door Sensor
What causes garage door sensors to malfunction?
- Dirt and Debris: Dust or dirt on the lenses can block the infrared beam.
- Misalignment: Sensors need to be aligned directly facing each other to function properly.
- Wiring Issues: Loose or damaged wires can disrupt the connection.
- Physical Damage: Accidents or impacts can damage sensors.
- Weather Conditions: Extreme weather can affect performance.
Can I repair the garage door sensor myself?
Yes, many issues can be fixed with DIY steps:
- Turn Off the Power: Disconnect the power to avoid accidents.
- Inspect and Clean: Check for dirt or damage and clean the lenses with a soft cloth.
- Adjust Alignment: Use a level to align sensors properly.
- Check Wiring: Inspect and repair any damaged wires.
For persistent issues or complex problems, consult a professional to ensure safety and proper repair.
How often should I clean my garage door sensors?
- Monthly: Wipe lenses to remove dust.
- Seasonally: Check alignment and condition.
- Annually: Have a professional inspect your system.
What tools do I need to repair a garage door sensor?
- Screwdriver: For adjustments.
- Soft Cloth: For cleaning lenses.
- Level: To align sensors.
- Multimeter: To check the wiring.
- Electrical Tape: For securing wires.
How do I know if my garage door sensor needs replacing?
- Persistent Malfunctions: Issues despite DIY fixes.
- Physical Damage: Visible cracks or breaks.
- Unresponsive Lights: No change in sensor behavior.
- Age: Older sensors may need replacement.
For persistent problems or replacement needs, professional help is recommended. Contact Ryder Garage Doors for expert assistance and keep your garage door operating smoothly!
Conclusion
Regular maintenance of your garage door sensors is essential for keeping your garage door repair system running smoothly and safely. Regularly cleaning and checking your sensors can prevent small issues from escalating into major problems. Addressing sensor issues promptly not only enhances safety but also ensures convenience, avoiding interruptions to your daily routine. Keeping your sensors in top condition contributes to the overall reliability of your garage door system.
End Note
At Ryder Garage Doors, we are dedicated to delivering top-notch garage door services tailored to your unique needs. Whether you’re looking for expert installations, dependable maintenance, or swift repairs, our team is here to ensure your garage door functions seamlessly. Explore our range of services and witness our craftsmanship on our Services and Gallery pages.
We proudly serve multiple communities, bringing premium garage door solutions right to your doorstep. Check out our Service Areas to see if we’re in your neighborhood. Learn more about our mission, values, and unwavering commitment to customer satisfaction on our About Us page.
Stay updated with the latest tips, trends, and expert advice on our blog. Connect with us on Facebook and Instagram for real-time updates, customer stories, and engaging content.
We’re here to meet all your garage door needs. Don’t hesitate to reach out via our Contact Us page. At Ryder Garage Doors, your satisfaction is our priority. Contact us today and experience the excellence!


