
Setting up a garage door opener can seem daunting, but mastering how to set up the garage door opener correctly is crucial for ensuring smooth operation and security for your home. A well-installed opener not only makes accessing your garage more convenient but also enhances the safety of your household by ensuring the door functions properly every time. Whether you’re replacing an old opener or installing a new one, understanding the correct setup process is key to avoiding common issues and ensuring long-term reliability.
In this guide, we’ll walk you through the essential steps to install your garage door opener efficiently. We’ll cover everything from gathering the necessary tools and preparing your garage door to installing the opener and performing final tests. By the end of this guide, you’ll have a clear understanding of how to complete the installation and be ready to enjoy the benefits of a smoothly operating garage door.
Gather Your Tools and Materials
Before you embark on the installation of your garage door opener, it’s crucial to gather all the necessary tools and materials. Being well-prepared will not only streamline the process but also help you avoid interruptions. Here’s a comprehensive list to ensure you have everything you need:
Tools:
- Screwdriver: A good-quality screwdriver is essential for securing screws and assembling various components. Both flathead and Phillips head screwdrivers may be needed depending on the type of screws used in your installation.
- Ladder: A sturdy ladder is necessary to reach high places, such as the ceiling of your garage, where you’ll be installing the mounting bracket and attaching the opener unit.
- Drill: A power drill will help you quickly make holes for mounting brackets and secure the opener unit. It’s especially useful if you need to install additional anchors or screws.
- Pliers: Pliers can be handy for holding small parts in place or tightening nuts and bolts.
Materials:
- Garage Door Opener Unit: This is the central piece of your installation, which includes the motor and various components. Ensure you have the correct model compatible with your garage door and that it comes with all necessary parts.
- Mounting Hardware: Your garage door opener kit should include mounting brackets, screws, and other hardware required for securing the opener to the ceiling. Check the manual to ensure you have all the necessary pieces.
- Safety Sensors: These are crucial for detecting obstacles and ensuring the door reverses if it encounters anything in its path. Make sure these sensors are included and in good condition.
- Batteries: If your opener includes a remote control or keypad, ensure you have fresh batteries to test these components once installed.
Additional Considerations:
- Owner’s Manual: Keep the installation manual handy. It provides detailed instructions and diagrams specific to your model, making the setup process smoother.
- Lubricant: Having a lubricant on hand can be useful for maintaining the garage door’s moving parts and ensuring smooth operation.
With these tools and materials ready, you’re set to tackle the installation of your garage door opener with confidence. Ensuring that you have everything you need before you start will make the process more efficient and less stressful. If you find yourself missing any items or need further assistance, don’t hesitate to contact our team of experts for support.
Prepare the Garage Door
Before diving into the installation of your garage door opener, it’s essential to ensure that your garage door is in optimal condition. Proper preparation not only simplifies the installation process but also ensures the longevity and smooth operation of your new opener. Here’s how to get your garage door ready:
Check and Ensure the Garage Door is Balanced and in Good Condition
A balanced garage door operates smoothly and evenly, which is crucial for the proper functioning of your new opener. Here’s how to check for balance and overall condition:
- Manual Operation Check: Disconnect the garage door from the existing opener (if applicable) by pulling the emergency release cord. Manually lift the door halfway and let it go. If the door remains in place, it is balanced. If it drifts up or down, the door may need adjustment or professional service. This balance is essential for the opener to function correctly and avoid unnecessary strain on the motor.
- Inspect for Damage: Examine the door panels, tracks, and springs for any signs of wear or damage. Look for dents, cracks, or rust, as well as any loose or missing hardware. Addressing these issues before installation can prevent problems down the line and ensure smooth operation.
- Lubricate Moving Parts: Apply a garage door lubricant to the rollers, hinges, and tracks. This will help reduce friction and ensure the door moves smoothly, which is crucial for the opener’s performance.
- Check the Springs: Look at the tension of the garage door springs. They should not be overly tight or too loose. If you notice any problems with the springs, it’s best to have them inspected and repaired by a professional before proceeding with the opener installation.
Disconnect the Garage Door from the Opener
If your garage door is currently attached to an old opener, you’ll need to disconnect it to proceed with the installation of your new opener. Follow these steps to safely detach the door:
- Locate the Release Mechanism: Find the emergency release cord, usually a red cord hanging from the trolley on the opener. Pulling this cord will disconnect the door from the opener, allowing you to manually operate the door.
- Manually Operate the Door: Once disconnected, test the door by lifting and lowering it manually. This ensures that the door operates smoothly on its own and confirms that it’s properly balanced.
- Secure the Door: To prevent the door from moving while you work on the new opener, consider using a C-clamp or locking pliers on the door tracks. This will keep the door in place and prevent accidental movement.
Preparing your garage door is a critical step in ensuring that your new opener functions correctly and efficiently. By checking the door’s balance, inspecting for damage, and disconnecting it from the old opener, you’ll set the stage for a successful installation.
Install the Mounting Bracket
Installing the mounting bracket is a pivotal step in setting up your garage door opener. The bracket acts as the foundation for the opener unit, so it’s essential to install it correctly to ensure smooth and reliable operation. Here’s a detailed guide to help you get it right:
Position the Bracket on the Ceiling
- Find the Center: Start by determining the center of your garage door. Use a measuring tape to mark the center point on the ceiling directly above the door. This alignment is crucial because the opener unit must be centered for the door to operate evenly and avoid unnecessary wear.
- Check for Obstructions: Ensure there are no beams, pipes, or other obstructions in the area where you plan to install the bracket. If necessary, adjust your positioning to accommodate these elements or seek alternative installation solutions.
- Use a Level: Place the mounting bracket on the ceiling at the marked center point. Use a level to make sure the bracket is perfectly horizontal. This will prevent the opener from being installed at an angle, which can lead to operational issues and uneven wear on the door.
Secure the Bracket
- Mark the Drill Holes: With the bracket in position, mark the locations for the screw holes on the ceiling. Make sure the marks align with the holes in the bracket. Double-check the alignment with your level before proceeding.
- Drill Pilot Holes: Using a drill, create pilot holes at the marked locations. If your ceiling is made of wood, standard screws may be sufficient. For concrete or metal ceilings, use the appropriate anchors to ensure a secure installation.
- Install Screws and Anchors: Insert the provided screws and anchors into the pilot holes. Tighten them securely, ensuring that the bracket is firmly attached to the ceiling. It’s important that the bracket is stable and doesn’t wobble, as any movement can affect the performance of your garage door opener.
Double-Check Alignment
- Verify Position: Once the bracket is secured, use your level again to confirm that it is still perfectly horizontal. Adjust if necessary before moving on to the next steps of the installation.
- Inspect Stability: Gently tug on the bracket to ensure it’s firmly attached. There should be no movement or looseness. If you notice any issues, recheck the screws and anchors to make sure they are properly installed.
Proper installation of the mounting bracket is critical for the effective and long-term performance of your garage door opener. By positioning it correctly and securing it firmly, you’re laying the groundwork for a smooth and trouble-free operation.
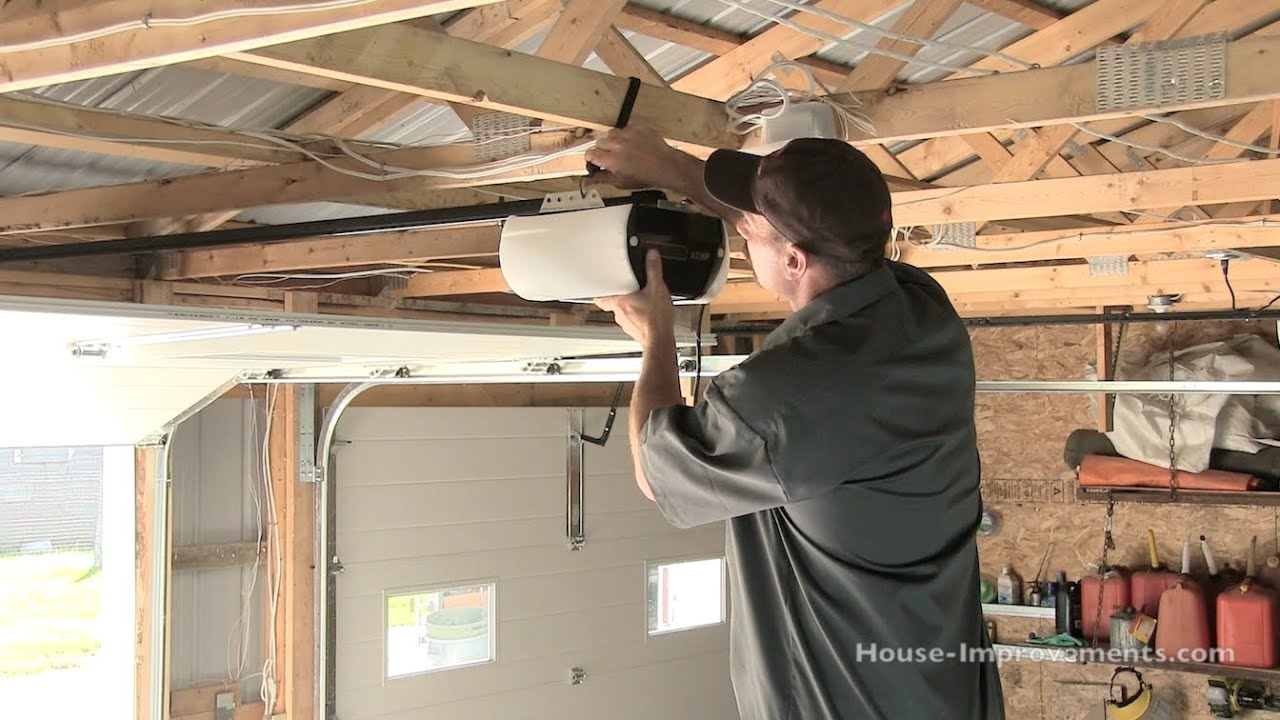
Attach the Opener Unit
With the mounting bracket securely installed, it’s time to attach the garage door opener unit. This step is crucial for ensuring that the opener operates efficiently and lasts for years to come. Here’s a detailed guide to help you complete this task with precision and ease:
Lift and Position the Opener Unit
- Prepare for Installation: Before lifting the opener unit, make sure you have a clear workspace. It might be helpful to have an extra set of hands to assist with lifting and positioning the unit, especially if it is heavy or bulky.
- Align the Opener: Position the opener unit beneath the mounting bracket. Ensure that the unit is aligned with the bracket and the pre-drilled holes for securing the opener. Alignment is key to avoid misalignment issues that could affect the door’s performance.
- Check for Proper Placement: Ensure the opener unit is centered and positioned directly beneath the mounting bracket. It should be at a height that allows for proper connection of the drive system and ensures there’s no interference with the door’s movement.
Secure the Opener Unit
- Attach with Hardware: Use the provided screws, bolts, and other hardware to secure the opener unit to the mounting bracket. Follow the manufacturer’s instructions for the correct placement of each piece of hardware. Tighten the screws and bolts firmly but be cautious not to overtighten, as this could damage the unit or the bracket.
- Check Stability: Once the opener is attached, gently wiggle it to ensure it is firmly secured and doesn’t move. A stable unit is essential for smooth operation and to prevent wear and tear on the opener and garage door.
Make Electrical Connections
- Follow the Manual: Refer to the installation manual for detailed instructions on making electrical connections. Typically, this involves connecting the opener to a power source and linking the motor to the drive system. Ensure that all connections are made according to the manufacturer’s specifications.
- Secure Wires: Use wire nuts or connectors as specified in the manual to ensure a safe and secure connection. Avoid leaving any loose or exposed wires, as this could pose a safety hazard or cause malfunction.
- Test Connections: Once the connections are made, double-check them to ensure they are secure and properly insulated. An incorrect or loose connection can lead to operational issues or even damage to the opener unit.
Position the Unit for Smooth Operation
- Align with the Door: Ensure that the opener unit is positioned to facilitate the smooth operation of the garage door. The drive system should be aligned with the door’s tracks, and there should be enough clearance for the door to open and close without obstruction.
- Avoid Strain on the Motor: Position the unit to minimize strain on the motor and other components. Proper alignment and positioning will help ensure the opener functions efficiently and extends its lifespan.
Attaching the opener unit correctly is a vital step in the installation process. By carefully lifting, securing, and making proper electrical connections, you set the stage for optimal performance and reliability of your garage door opener.
Test the Garage Door Opener
After successfully installing the garage door opener, it’s time to conduct a thorough final test to ensure that everything is working as it should. Testing the system is crucial to confirm smooth operation and to make any necessary adjustments before you start using the opener regularly. Here’s how to carry out a comprehensive test of your garage door opener:
Perform Initial Testing
- Check for Smooth Operation: Begin by using the remote control or wall-mounted keypad to open and close the garage door. Observe the door’s movement to ensure it operates smoothly without any jerks or unusual noises. The door should open and close in a steady, controlled manner.
- Observe the Door’s Travel: Watch the door as it moves along its tracks. It should move evenly and without binding or rubbing against the tracks or other components. If you notice any resistance or noise, it might indicate that adjustments are needed.
Test the Reversal Mechanism
- Safety Sensor Check: Place an object, such as a small block of wood or a rolled-up towel, in the door’s path while it is closing. The door should reverse immediately upon encountering the obstruction. This test is crucial for ensuring the safety sensors are properly aligned and functioning.
- Adjust Sensor Alignment: If the door doesn’t reverse correctly, check the alignment of the safety sensors. They should be facing each other directly and at the same height. Adjust their position as needed to ensure proper operation.
Fine-Tune Settings
- Adjust Travel Limits: Most garage door openers have adjustable travel limits that control how far the door opens and closes. Consult the opener’s manual to adjust these settings if the door doesn’t fully open or close. Properly adjusted limits ensure that the door stops at the correct positions and doesn’t over-travel.
- Set the Force Sensitivity: Adjust the opener’s force settings to control how much force is applied when the door opens and closes. This helps prevent the door from getting stuck or causing damage. Refer to the manual for guidance on setting the correct force levels for your specific opener.
- Check Remote and Keypad Functions: Test all remotes and keypads to ensure they are programmed correctly and functioning as expected. Make any necessary adjustments or reprogramming to ensure reliable operation.
Perform a Final Inspection
- Verify All Connections: Double-check all electrical and mechanical connections to ensure they are secure and properly installed. Loose connections can lead to operational issues or safety hazards.
- Inspect the Door and Opener: Conduct a final visual inspection of the door and opener unit. Look for any signs of misalignment, wear, or damage that may need attention.
Garage Door Opener Installation: Expert Answers to Your Top Questions
What tools are needed to set up a garage door opener?
To successfully set up a garage door opener, you’ll need a few essential tools. A screwdriver is necessary for securing various components, while a ladder will help you reach high areas for mounting the bracket and attaching the opener unit. Additionally, a drill can be useful for making pilot holes and securing hardware, especially if your ceiling is made of a material like concrete or metal. Always check the opener’s manual for any additional tools or specific requirements for your particular model. Ensuring you have all the required tools on hand will streamline the installation process and help you avoid interruptions.
How do I know if my garage door is balanced before installation?
To check if your garage door is balanced, manually lift the door halfway and then release it. If the door remains in place, it is balanced. If the door drifts up or down, it indicates an imbalance that could affect the opener’s performance. An unbalanced door can strain the opener motor and cause uneven wear on the door components. If you find that your door is unbalanced, it may need adjustment or garage door repair before you proceed with the opener installation. A properly balanced door ensures smooth operation and helps prevent potential issues with the opener.
What should I do if the garage door opener doesn’t respond after programming the remote?
If your garage door opener doesn’t respond after programming the remote, start by checking the batteries in the remote control. Weak or dead batteries can prevent communication between the remote and the opener. Next, ensure you follow the correct programming steps as outlined in the opener’s manual. Incorrect programming can lead to non-responsiveness. Finally, verify that the opener is receiving power by checking the power source and connections. If these steps don’t resolve the issue, there may be a problem with the opener’s receiver or the remote itself, and you might need to consult the manual or seek professional assistance.
Can I install a garage door opener on a wooden garage door?
Yes, you can install a garage door opener on a wooden garage door, but there are a few considerations to keep in mind. Ensure that the wooden door is sturdy and in good condition, as a weak or damaged door might not support the opener’s operation effectively. Additionally, check that the installation hardware provided with the opener is compatible with wooden doors. You may need special fasteners or reinforcements to secure the opener properly. Proper installation and reinforcement will help ensure the opener functions smoothly and avoids any issues due to the door’s material.
How often should I have my garage door opener serviced?
For optimal performance and safety, it is recommended to have your garage door opener inspected and serviced annually. Regular maintenance helps identify and address potential issues before they become major problems, ensuring that the opener operates smoothly and efficiently. During a service visit, a technician can check the alignment, test the safety features, and lubricate moving parts. Routine servicing not only extends the lifespan of your opener but also provides peace of mind knowing that your new garage door system is in good working condition.
Conclusion
Proper installation and thorough testing of your garage door opener are essential for ensuring that it operates smoothly and securely. By following these steps—gathering your tools, preparing the door, installing the mounting bracket and opener, and performing detailed tests—you can achieve a successful setup that enhances convenience and provides peace of mind. A well-installed and properly tested garage door opener not only makes daily use effortless but also ensures the safety and reliability of your garage door system.
End Note
At Ryder Garage Doors, we are dedicated to delivering outstanding garage door services tailored to your needs. Whether you need expert installation, dependable maintenance, or swift repairs, our team ensures your garage door operates seamlessly. Explore our Services and Gallery pages to discover our comprehensive range of services and witness the quality of our work.
We proudly serve a wide array of locations, bringing our top-notch services right to your community. Check out our Service Areas to see if we’re in your neighborhood. Learn more about our mission, values, and commitment to customer satisfaction on our About Us page.
Stay updated with the latest tips, trends, and insights on garage door repair and maintenance by following our blogs. Connect with us on Facebook and Instagram for real-time updates, customer reviews, and engaging content.
We’re here to meet all your garage door needs. Don’t hesitate to reach out through our Contact Us page. At Ryder Garage Doors, your satisfaction is our top priority. Contact us today and experience the difference!


