Garage door springs and cables are essential components that keep your garage door functioning smoothly. They support the weight of the door, making it easier to open and close, and ensure balanced operation. Over time, these parts can wear out or become damaged, potentially leading to operational issues or safety hazards.
The task of installing new garage door springs and cables might sound intimidating, but with the right tools and a clear step-by-step approach, it’s a manageable DIY project. Understanding how to install garage door springs and cables can empower you to maintain your garage door efficiently, saving you both time and money. Ready to get started? Read on for a comprehensive guide that will walk you through the entire process.
Safety Precautions
When working with garage door springs and cables, prioritizing safety is crucial due to the high tension these components are under. Proper safety measures not only protect you from potential injuries but also ensure the installation process is executed correctly.
Necessary Safety Gear
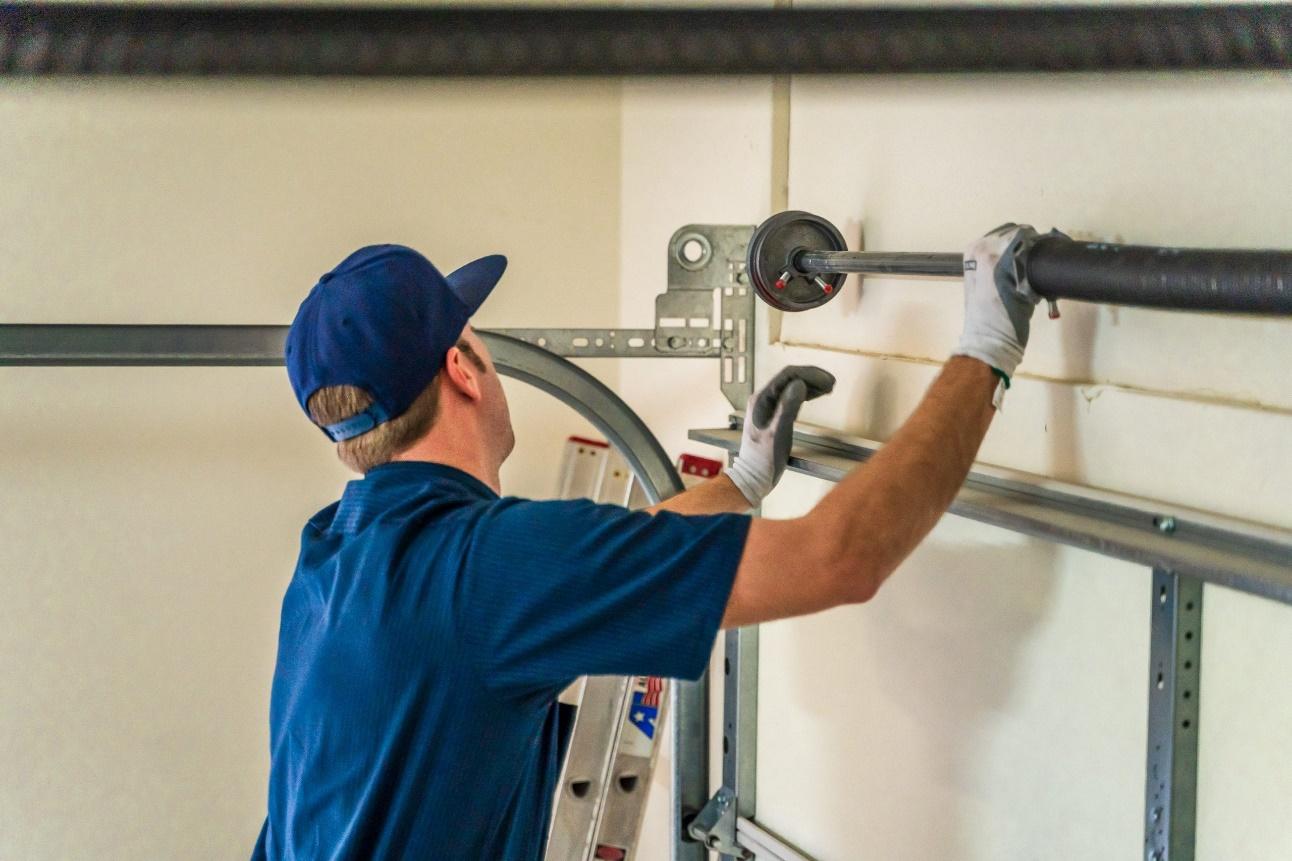
- Gloves: Use heavy-duty work gloves to shield your hands from sharp edges and potential injuries during the installation process. Gloves also improve your grip on tools and parts, making the handling of components safer and more efficient.
- Goggles: Safety goggles are essential to protect your eyes from debris, which can be expelled if a spring or cable snaps. Ensuring your eyes are covered minimizes the risk of serious injuries.
- Sturdy Ladder: A solid and reliable ladder is crucial for reaching the high areas of the garage door system. Ensure the ladder is placed on a stable surface and does not wobble during use. This prevents falls and maintains safety while working at heights.
Tips on Handling High-Tension Springs Safely
- Properly Release Tension: Always use winding bars to release the tension from the springs in a controlled manner. Avoid using improvised tools or methods, as improper tension release can lead to dangerous situations.
- Maintain a Safe Distance: When working with high-tension springs, keep a safe distance from the springs and cables. This precaution helps protect you in case of unexpected spring snaps or cable failures.
- Follow Manufacturer’s Guidelines: Adhere to the manufacturer’s instructions for handling and installing springs. Each system may have specific requirements, and following these guidelines ensures proper installation and safety.
- Avoid over-tightening: When installing new springs, be mindful of the tension you apply. Over-tightening can strain the springs and related components, leading to premature wear or failure.
- Consult a Professional If Needed: If you have any doubts about the process or feel unsure about handling the springs, seek assistance from a professional. Professional installers have the expertise to handle high-tension components safely and effectively.
By taking these safety precautions, you can minimize risks and ensure a successful installation of garage door springs and cables. Safety should always be your top priority to protect yourself and maintain the functionality of your garage door system.
Tools and Materials Needed
Having the right tools and materials is crucial for successfully installing garage door springs and cables. This section provides a comprehensive list of what you’ll need and explains the purpose of each item, ensuring you’re well-prepared for the task.
Essential Tools
- Winding Bars: These specialized tools are used to adjust the tension of the springs. Winding bars are inserted into the holes of the spring and turned to wind or unwind the spring. This process is vital for ensuring the springs are properly tensioned, which directly affects the door’s balance and functionality. Using winding bars helps manage the high tension safely and efficiently.
- Adjustable Wrench: An adjustable wrench is a versatile tool used for various tasks, such as loosening or tightening nuts and bolts. In the context of garage door repair, it helps in adjusting the spring anchors and securing other components. Its ability to adjust to different sizes makes it indispensable for working with various fasteners on the door system.
- Socket Set: A socket set includes a range of sockets and a ratchet handle, allowing for precise tightening and loosening of bolts. It’s particularly useful for tasks requiring specific torque settings and helps in dealing with the various bolts and nuts found on garage door springs and cables. The variety of socket sizes in a set ensures compatibility with different fasteners.
Required Materials
- New Springs: Springs are integral to the operation of your garage door, providing the necessary force to lift and lower the door. There are two main types of garage door springs: torsion springs and extension springs. Torsion springs are installed above the door and are responsible for lifting the door evenly, while extension springs are located on either side of the door and stretch to assist in the door’s movement. Be sure to select the correct type and size of springs to match your door’s specifications and weight.
- Cables: Cables work in tandem with the springs to support the door’s movement. They run through the pulleys and connect to the door, ensuring it lifts and lowers smoothly. Properly sized and high-quality cables are essential to handle the tension from the springs and to prevent snapping or fraying, which could lead to door malfunction or safety hazards.
- Replacement Drum (if needed): The drum is a cylindrical component that helps guide the cables as they wind and unwind. Over time, drums can wear out or become damaged, which can affect the smooth operation of the door. Replacing worn or damaged drums ensures that the cables are properly aligned and reduces the risk of cable slippage or breakage.
Additional Considerations
- Lubricant: Although not always required, a garage door lubricant can help ensure the smooth operation of the door’s moving parts after installation. It reduces friction between metal parts, such as the springs and cables, helping to prevent wear and extend the life of these components.
- Safety Equipment: Don’t forget to include safety gloves and goggles in your toolkit. These items protect you from sharp edges, debris, and potential injuries during the installation process.
With your tools and materials ready, you’re set to begin the installation of your garage door springs and cables. Follow the upcoming sections for a detailed, step-by-step guide on how to remove old components and install new ones, ensuring a safe and effective upgrade to your garage door system.
Removing Old Springs and Cables
Removing old garage door springs and cables is a crucial step before installing new components. Properly executing this process ensures a safe and effective upgrade to your garage door system. Here’s a comprehensive guide to help you through the removal process.
Step-by-Step Instructions on How to Safely Release Tension and Remove Old Springs
- Prepare Your Workspace:
- Secure the Garage Door: Before you begin, ensure the garage door is fully closed. Use locking pliers or a clamp to prevent any movement of the door during the process. This prevents accidental injuries and ensures stability.
- Secure the Garage Door: Before you begin, ensure the garage door is fully closed. Use locking pliers or a clamp to prevent any movement of the door during the process. This prevents accidental injuries and ensures stability.
- Release the Spring Tension:
- Identify the Spring System: Determine whether your garage door uses torsion springs (mounted above the door) or extension springs (mounted on the sides). This will guide the removal process.
- Torsion Springs:
- Insert Winding Bars: Locate the winding cone on each end of the torsion spring. Insert the winding bars into the holes on the cone.
- Release Tension: Gradually turn the bars in the winding direction to relieve tension from the springs. This should be done slowly to avoid sudden releases of tension.
- Remove Set Screws: Once the tension is fully released, use a socket set or adjustable wrench to remove the set screws that secure the springs to the center bracket.
- Remove Springs: Carefully slide the springs off the shaft and remove them from their brackets.
- Insert Winding Bars: Locate the winding cone on each end of the torsion spring. Insert the winding bars into the holes on the cone.
- Extension Springs:
- Disconnect Springs: Locate the extension springs on either side of the door. Disconnect the springs from the pulley system by unhooking them from the pulleys or mounting brackets.
- Release Tension: Carefully unwind the springs to release their tension. Follow the manufacturer’s instructions for this process to avoid accidents.
- Disconnect Springs: Locate the extension springs on either side of the door. Disconnect the springs from the pulley system by unhooking them from the pulleys or mounting brackets.
- Identify the Spring System: Determine whether your garage door uses torsion springs (mounted above the door) or extension springs (mounted on the sides). This will guide the removal process.
- Remove the Springs:
- Torsion Springs: After releasing the tension, remove the springs from their mounting brackets. Slide the springs off the shaft, ensuring not to drop them or let them snap back.
- Extension Springs: Once disconnected, remove the springs from their hooks or brackets.
- Torsion Springs: After releasing the tension, remove the springs from their mounting brackets. Slide the springs off the shaft, ensuring not to drop them or let them snap back.
Detailed Guidance on Detaching Old Cables and Removing the Drums
- Detach the Old Cables:
- Locate the Cables: Identify where the cables are attached to the door and the spring system.
- Disconnect Cables: For torsion spring systems, release the cables from the drum by loosening the securing clips or hardware. For extension spring systems, unhook the cables from the door brackets and pulleys. Make sure to remove the cables completely to avoid any interference with the new components.
- Locate the Cables: Identify where the cables are attached to the door and the spring system.
- Remove the Drums:
- Locate the Drums: Find the drums at each end of the spring shaft.
- Detach Drums: Use an adjustable wrench or socket set to remove the bolts or screws holding the drums in place. Slide the drums off the shaft carefully. Drums guide the cables as they wind and unwind, so removing them requires caution to avoid damaging the shaft or surrounding components.
- Locate the Drums: Find the drums at each end of the spring shaft.
- Inspect and Clean:
- Inspect Removed Parts: Examine the old springs, cables, and drums for signs of wear or damage. This can provide insight into why replacement was necessary and help ensure that new parts will resolve any issues.
- Clean the Area: Clear any debris or dust from the installation area. A clean workspace ensures that new components are installed on a smooth surface, which helps with proper functioning and longevity.
- Inspect Removed Parts: Examine the old springs, cables, and drums for signs of wear or damage. This can provide insight into why replacement was necessary and help ensure that new parts will resolve any issues.
With the old springs, cables, and drums removed, you’re ready to move on to the installation of new components. Continue to the next section for a detailed guide on installing new springs and cables, ensuring your garage door will operate smoothly and safely.
Installing New Springs
Installing new garage door springs is a vital process that ensures your door operates smoothly and efficiently. Proper installation not only enhances the performance of your door but also helps prevent potential issues. Follow this detailed guide to measure, purchase, and install your new springs effectively.
How to Measure and Purchase the Correct Replacement Springs
- Identify the Type of Springs:
- Torsion Springs: These are mounted above the door and provide balanced lifting power. They are tightly wound and can be adjusted to handle different weights.
- Extension Springs: Positioned on either side of the door, these springs stretch to assist in lifting the door. They work with pulleys and cables.
- Torsion Springs: These are mounted above the door and provide balanced lifting power. They are tightly wound and can be adjusted to handle different weights.
- Measure Existing Springs:
- Torsion Springs:
- Length: Measure the spring’s length from end to end when it is not under tension. Accurate length measurement ensures compatibility with your door system.
- Diameter: Use a caliper to measure the diameter of the wire. This measurement determines the spring’s strength and how it will perform.
- Wire Size: Measure the thickness of the spring wire. This detail is crucial for selecting springs with the correct load capacity.
- Length: Measure the spring’s length from end to end when it is not under tension. Accurate length measurement ensures compatibility with your door system.
- Extension Springs:
- Length: Measure the length of the spring when fully extended to find the correct replacement size.
- Diameter: Measure the wire diameter to ensure the new springs will match the required strength.
- Spring Rate: Check the spring rate or tension, which is vital for balancing the door correctly and ensuring proper operation.
- Length: Measure the length of the spring when fully extended to find the correct replacement size.
- Torsion Springs:
- Purchase the Correct Springs:
- Consult Manufacturer Specifications: Verify the correct sizes and types of springs with your garage door manufacturer’s specifications. This ensures you purchase components that match your door’s requirements.
- Buy from Reputable Suppliers: Purchase springs from trusted suppliers to guarantee quality and safety. Reliable sources provide products that meet industry standards and offer better durability.
- Consult Manufacturer Specifications: Verify the correct sizes and types of springs with your garage door manufacturer’s specifications. This ensures you purchase components that match your door’s requirements.
Step-by-Step Guide on Installing New Springs
- Prepare for Installation:
- Ensure Safety: Wear safety gloves and goggles to protect yourself. Secure the garage door in the closed position using locking pliers or a clamp to prevent movement.
- Gather Tools: Have winding bars, an adjustable wrench, and a socket set ready. These tools are essential for handling and installing the springs effectively.
- Ensure Safety: Wear safety gloves and goggles to protect yourself. Secure the garage door in the closed position using locking pliers or a clamp to prevent movement.
- Install New Torsion Springs:
- Position the Springs: Slide the new torsion springs onto the spring shaft, aligning them with the end brackets and the center bracket.
- Secure the Springs: Attach the springs to the brackets using the provided hardware. Ensure all fasteners are tightened securely.
- Wind the Springs: Insert winding bars into the holes on the winding cones of the springs. Gradually wind the springs to the specified tension according to the manufacturer’s instructions. This step must be done carefully to manage the high tension safely and avoid accidents.
- Secure Set Screws: Once the springs are wound to the correct tension, tighten the set screws on the winding cones to lock the springs in place.
- Position the Springs: Slide the new torsion springs onto the spring shaft, aligning them with the end brackets and the center bracket.
- Install New Extension Springs:
- Attach to Pulleys and Brackets: Hook the new extension springs onto the pulleys and mounting brackets. Ensure proper alignment and secure attachment.
- Adjust Tension: Adjust the tension of the springs to ensure they provide the correct lifting force. Proper tension is crucial for the door’s balance and smooth operation.
- Attach to Pulleys and Brackets: Hook the new extension springs onto the pulleys and mounting brackets. Ensure proper alignment and secure attachment.
- Test the Door:
- Operate the Door: Open and close the garage door multiple times to test its function. Listen for any unusual noises and observe the door’s movement to ensure it operates smoothly.
- Make Final Adjustments: If necessary, adjust the spring tension or alignment to achieve optimal performance and ensure the door operates correctly.
- Operate the Door: Open and close the garage door multiple times to test its function. Listen for any unusual noises and observe the door’s movement to ensure it operates smoothly.
Installing New Cables
Properly installing new cables is essential for the efficient and safe operation of your garage door. These cables help distribute the tension from the springs and ensure smooth movement. Follow these instructions to install your new cables correctly and ensure optimal performance.
Instructions on How to Thread New Cables Through the Drums
- Prepare the Cables:
- Select the Correct Cables: Ensure you have the right type and length of cables for your garage door. Check the specifications provided by the manufacturer or supplier.
- Select the Correct Cables: Ensure you have the right type and length of cables for your garage door. Check the specifications provided by the manufacturer or supplier.
- Thread the Cables Through the Drums:
- Position the Drums: Confirm that the drums are securely mounted on the shaft. They should be aligned properly to prevent any wobbling.
- Feed the Cables: Insert one end of the cable into the drum’s cable hole and pull it through until it is fully seated in the drum.
- Secure the Cables: Loop the cable around the drum and thread it through the appropriate pulley or bracket. Ensure that the cable is properly positioned to avoid any tangling or slipping.
- Position the Drums: Confirm that the drums are securely mounted on the shaft. They should be aligned properly to prevent any wobbling.
- Attach the Cable to the Garage Door:
- Connect the Cable: Attach the free end of the cable to the garage door’s lower bracket or attachment point. Use the appropriate hardware to secure the cable tightly.
- Connect the Cable: Attach the free end of the cable to the garage door’s lower bracket or attachment point. Use the appropriate hardware to secure the cable tightly.
Tips on Ensuring Proper Tension and Alignment of the Cables
- Check for Proper Alignment:
- Inspect the Path: Ensure the cables run smoothly through the drums and pulleys without kinks or twists. Proper alignment prevents uneven wear and ensures smooth operation.
- Adjust the Pulleys: Verify that the pulleys are correctly aligned with the drums. Misalignment can lead to uneven cable wear and impact door performance.
- Inspect the Path: Ensure the cables run smoothly through the drums and pulleys without kinks or twists. Proper alignment prevents uneven wear and ensures smooth operation.
- Ensure Proper Tension:
- Verify Tension: Check that the cables have the correct amount of tension. Incorrect tension can cause the door to be difficult to operate or lead to slippage.
- Adjust as Needed: If the cables are too loose or tight, adjust the tension by repositioning the brackets or adjusting the spring tension. Follow the manufacturer’s recommendations for proper tension settings.
- Verify Tension: Check that the cables have the correct amount of tension. Incorrect tension can cause the door to be difficult to operate or lead to slippage.
- Perform a Visual Inspection:
- Look for Wear: Regularly inspect the cables for signs of wear, fraying, or damage. Replace any damaged cables immediately to prevent potential accidents or further damage.
- Look for Wear: Regularly inspect the cables for signs of wear, fraying, or damage. Replace any damaged cables immediately to prevent potential accidents or further damage.
While this guide focuses on the installation of new cables, remember that proper testing and final adjustments are crucial for ensuring your garage door operates smoothly and safely. After installation, test the door’s operation and balance. If you encounter issues or are unsure about the final adjustments, consider consulting a professional for assistance.
Frequently Asked Questions on How to install garage door springs and cables
Why is it important to replace garage door springs and cables in pairs?
Replacing garage door springs and cables in pairs is essential for maintaining balanced operation and optimal performance of the door. When one spring or cable wears out, it can cause uneven lifting and strain on the remaining components, leading to premature failure and potential malfunction. Replacing them simultaneously ensures that both sides of the door exert equal force, reducing the risk of uneven wear and enhancing overall safety and efficiency.
How often should garage door springs be replaced?
Garage door springs typically require replacement every 5 to 7 years, although this timeline can vary based on usage frequency and environmental conditions. Regular inspections are crucial for identifying signs of wear or deterioration that may necessitate earlier replacement. Factors such as the number of cycles (openings and closings) the springs undergo can influence their lifespan, making periodic checks essential for timely maintenance.
Can I replace garage door springs and cables myself?
Yes, replacing garage door springs and cables can be undertaken as a DIY project provided that you have the requisite tools, and technical knowledge, and adhere to all safety precautions. However, due to the high tension and potential hazards involved, consulting a professional is advisable if you are uncertain about any aspect of the installation. Professionals possess the expertise to ensure precise installation and avoid safety risks.
What are the signs that my garage door springs or cables need replacing?
Several indicators suggest that garage door springs or cables may need replacement. Common signs include difficulty lifting the door, uneven movement during operation, or a door that descends rapidly when raised. Additionally, visible signs of wear, such as fraying cables or rusted springs, can also signal the need for replacement to prevent further complications.
How do I choose the right replacement springs for my garage door?
Selecting the correct replacement springs involves measuring the size and weight of your garage door and consulting either a professional or the manufacturer’s specifications. Accurate measurements of spring length, diameter, and wire size are crucial for compatibility and performance. Consulting the manufacturer’s guidelines or a qualified technician ensures that you obtain springs that match the door’s requirements and function effectively.
Conclusion
Replacing garage door springs and cables is a crucial maintenance task that ensures the safe and efficient operation of your garage door. By understanding the importance of replacing these components in pairs, recognizing when replacements are needed, and following proper installation procedures, you can extend the lifespan of your door and maintain its smooth operation. Whether you choose to tackle the project yourself or enlist the help of a professional, ensuring the correct installation and timely replacement of these parts is essential for a reliable and safe new garage door system.
End Note
At Ryder Garage Doors, we are dedicated to delivering outstanding garage door services tailored to your needs. Whether you need expert installation, dependable maintenance, or swift repairs, our team ensures your garage door operates seamlessly. Explore our Services and Gallery pages to discover our comprehensive range of services and witness the quality of our work.
We proudly serve a wide array of locations, bringing our top-notch services right to your community. Check out our Service Areas to see if we’re in your neighborhood. Learn more about our mission, values, and commitment to customer satisfaction on our About Us page.
Stay updated with the latest tips, trends, and insights on garage door repair and maintenance by following our blogs. Connect with us on Facebook and Instagram for real-time updates, customer reviews, and engaging content.
We’re here to meet all your garage door needs. Don’t hesitate to reach out through our Contact Us page. At Ryder Garage Doors, your satisfaction is our top priority. Contact us today and experience the difference!